Friday, July 4, 2008

The Garden...

The new Garden!
We removed 15-20cm of excellent topsoil from the new house's "footprint" and created this new 10m x 7m garden.
This land has been intentionally fallow for 10 years and the soil is in great condition. It is 100% ORGANIC Certified and we will keep it this way.
Yuko is not too happy about me working in the garden with my "JA" (Japan Agricultural Cooperative) ballcap but she is looking forward to the healthy foods we will grow!
As always, I had to "Kaizou" (make it even better) this dirt, so I have added 1 ton of cow manure compost by hand. We will continue to keep this fallow for the rest of this season. Of course, more "Kaizou" will be done before we plant our first vegetables and herbs in the spring! Look for future posts.


From the Roof...

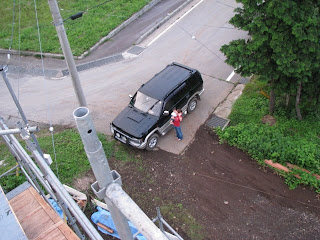
You know I just "had to" climb on the roof (doubutsu mitai) and snap a few pics...enjoy!


The View...

The first view from our bedroom windows...


Skylight!

The skylight is in!

Eaves and more...

The roof edges are taking shape. Exposed surfaces are all made of cedar for longevity (and stylish good looks!).


Exterior Wall Construction Method

Exterior walls begin with 1/2 inch plywood being applied directly to the posts, beams, and wall studs. This is covered with a moisture protective membrane (white sheet). Rows of 5/8 inch by 4 inch strapping are nailed on. This adds additional lateral stability (earthquake protection) as additional insulation capacity.
The finishing layer for the first floor will be Western Red Cedar clapboards.
The second floor will receive a fireproof mixture resembling hand applied stucco. This will also be done on the north and south walls due to their proximity to the property lines.
NOTE: Fire protection rules in Japan are very strict.


Corners...

Construction code calls for corner braces throughout the second floor so we opted to keep them open and make them an accent to the interior.


Electical Style

Electrical wiring style is very different from western methods. It is "according to code" so we press on...
Interior lighting, switches, and plugs are going to be a small challenge!


Framing Style

Some examples of the unique framing style....


Earthquake Protection

Strick rules for earthquake protection require several unique additions to the normal construction requirements. Here the sills are bolted to the rebar inside the concrete footers with a rubberized vibrations pad also installed. Additional anchors are attached to the actual posts throughout the house. With only the stick frame in place, it is easy to see that the building will be rock-solid!


Post & Beam

The post & beam joints are a combination of classic Japanese carpentry with modern earthquake protection bolts installed (BUT NOT VISIBLE!).


"Tatemae" or "Joutoushiki"

With the roof decking in place, we held a "Tatemae" or "Joutoushiki" event. This is designed to ensure the safety of the construction workers. It involved throwing salt, rice, and sake in all four directions (north, south, east, west). We had a few friends stop by for a snack and a drink as well.

Second Floor

The second floor walls and decking went up smoothly!


Rainy Season

The rain just kept falling......


The "Stick Frame"

The stick frame method is being used. The main beams and pillars (hari and hashira) were handmade by the carpenters in their workshop and then delivered to the work site. This is completely different from the method used in the United States.
Assembly day is going very fast! The second floor began taking shape in the afternoon of the first day!!!


The Working Platform

A basic flooring system is being built to provide a work platform for the carpenters, electricians, plumbers, and more.
A scaffolding system is being assembled to provide access to the higher areas of the house during the construction process.


The Foundation

Step 1: Several concrete pillars were sunk to bedrock to provide a firm and stable footing for the house.
Step 2: The dirt between the pillars was replaced with a concrete/gravel/sand/dirt mix to provide lateral stability.
Step 3: A flat slab of concrete was poured on top of the pillars and will serve as the platform for the house as well as the sub-floor.
Step 4: Footers (side walls) were poured to elevate the house from the slab (and ground level).
NOTE: Extensive reinforcement bars are used since we live in an earthquake prone area (Pacific Ring of Fire) and on the sid eof a volcano (Mount Fuji)!
NOTE: You can see all the rain we have been having, and that has slowed the construction down. We have just started the Rainy Season in our area of Japan!


Thursday, July 3, 2008

The Ground Breaking Ceremony

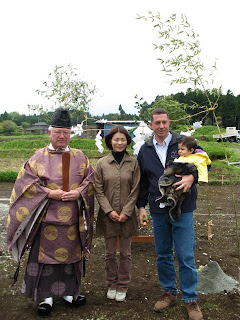
We conducted a traditional groundbreaking ceremony (Jichinsai) to hope for the safety of the work crews about to start the construction...


The Retaining Wall

We needed to install a retaining wall to ensure we had a solid base for our new house...

The Driveway (1st draft)

Here is our very first driveway: