Thursday, August 14, 2008

The Stairs...finally!

The stairs are finally in! We test-walked them last night!

Each tread is secured in place from below with a polymer wedge glued and hammered into place.

The last post for the second floor railing is in and ready for the railing. 
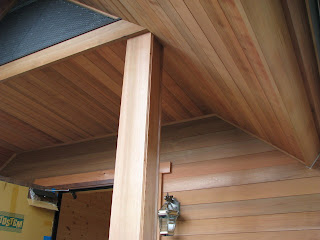
The tongue & groove has started on the wall and will be finished this Saturday.

Underneath is tongue and groove too. The carpenters are also installing an audio/visual cabinet (and home for our Musen 'Ham Radio' base station). The space under the stairs will also serve as our mini home office and house our PC (so we can post more Blogs, of course!). We are excited to see what design the carpenters create! Yuko already claimed this landing for herself, as the prime movie viewing spot!
The top for the stairwell is done and the floor was just installed!

Chimney chute and vent:

The chimney chute is done! It is lined with fireproof boarding (similar to drywall). We will have an access door (shown in the top picture) and chose to make the door out of wooden louvers to squeeze as much heat as possible from the stovepipe (a source of lots of heat, but usually it all goes out the chimney).

The access door on second floor (louvers are not made yet):
Fireproof board:

Looking down the chute:


Air Exchanger Ventilation:

To prevent the "Sick House Syndrome" we have installed dual flow passive/active air exchangers in both bedrooms. These act as passive air vents when in the 'Off' position, allowing a small amount of air to flow in and out of the house. In the 'On' position they use a small fan to both push and pull air from the inside and outside of the house. The air runs through a filter system as well and these are great in keeping dust and pollen out of the air as well! The first picture is the mounting plate and the second is the actual unit itself. There will also be external vent covers on the outside of the house, which we custom ordered (I will post a pic when they arrive and are installed). We also have a system of passive vents throughout the house to allow for air pressure differences, 'sick house' prevention, humidity control, and fresh air for the wood stove. This is shown in the bottom picture.


Stucco: the second step...

The second step of the stucco process is complete! Yesterday the staff applied a 1/2 inch layer of concrete/mortar mix on top of the stainless steel wire. They did the entire house in one day. Once this dries, they will put on one more layer, followed by the color/sealer coat. Due to the Japanese Obon holidays this week, they will be back next week for the second coat.

Above the front entrance:
Close-up:
Corner guides are still visible, until the next layer is applied:


Tuesday, August 12, 2008

Front Porch...

The front porch and steps are almost done. The pillars and ceiling are done in tongue and groove Cedar. It looks good and smells great! The main porch is completed and covered with protective sheets. It is made of large timber cedar. The posts are 4 X 4 and the decking is 2 X 10.

The carpenters took the time to make the step stringers the old fashioned way and they look great! A little rain never hurt anything:


Genkan floor and step

The floor has been poured (concrete) for the front hallway. The stone cutter will be doing his magic soon!
The first step into the house has also been installed (it is covered by protective cardboard but is the same as the lower kick board, the dark stained wood in the picture). Yuko is very concerned that this would like a typical Japanese entrance (she does not want that!). While the color and shape are normal, the finished product of the whole room will definitely not feel "standard" in any way!

Living Room Lights!!!

The living room lights are in and look great! We chose to install 25 watt decorative clear bulbs to enhance the interesting patterns they make on the tongue & groove walls. These will be on a dimmer. These look event better at night!


More Lights!

Here are the dining room canister lights (micro spots) and one wall sconce.


Here is the front entrance light combining old style with 3 adjustable micro spots: All the exterior lights 9front door, back door, deck) are this model:

Lights, Lights, and More Lights!

We started installing our light fixtures! These were all purchased in the US. A Huge THANK YOU goes out to Michelle and Jim for their advice, assistance, and overall logistics in making this possible! We are so lucky to be able to use these lights since the styles and quality available to us in Japan are limited at best (OK, the choices here stink!!!). In fact it is nearly impossible to find incandescent fixtures since virtually all of Japan is lit with fluorescent units! As you can imagine they are blinding, cannot be dimmed, NOT energy efficient, and would ruin a wooden home! BTW, they are also at least 5 times the cost as units from the US!!!!!

Here is the pantry:

Here is the toilet room:
Here is the Senmenjou (tooth brushing sink/changing room):

Kitchen Floor Tiles

Our final choices for the kitchen floor...We opted for 1/2 thick sealed masonry tiles for the kitchen vice natural stone for it's ability to resist stains associated with kitchen use. We chose the center tile for the majority of the room in 16 inch X 16 inch X 1/2 inch squares, with a border using the left sample in 6 inch X 6 inch X 1/2 inch small squares. We will use a dark grey grout and should end up with a very Mediterranean style floor! Hopefully it makes our cooking better!!

Wood Stove Foundation

The foundation for the wood stove has been poured! More to follow very soon!

Stone Choices for the Toilet Room

We have narrowed down our choices for the stone work for the toilet room. We will be installing real stone on the floor and lower half of the walls. Our stone cutter brought us samples of the final four colors we liked. The first picture shows all four. We chose the red and the bottom picture shows our choice. This is natural Marble and will be installed in 16 inch by 16 inch by 3/4 inch panels with dark grout. This color will help us to maintain a natural reddish/earth tones theme throughout the house. The pictures do not do these stones justice, so stop by and check it out soon!


Toilet Room Heater

In this area, most houses do not heat their toilet rooms (amazing, right!). We found some nice in-the-wall heaters while in the States and decided to install one. Our electrician found this compact, energy efficiant unit from a Japanese company. It is a 600watt/1200 watt electric unit and it has been installed and is waiting for the stone work to complete the wall.

Pocket Door

We have been extremely conscious of not wasting a single bit of floor space. One way to free up floor space was to use "Pocket Doors". These are doors that slide into pockets vice swinging. We chose these for the entrance to the toilet room, and to the senmenjo (tooth brushing sink)/laundry room. The carpenters did a nice job with the tongue & groove behind the doors. All that is left for the doors to be hung. ALMOST DONE!!!

Security Lights

2 of the 4 security light units have been installed. These are US products with 2 halogen 250 watt bulbs. We have one for each side of the house. They are multi-purpose (security light, work light, BBQ/party lighting). These are NOT the annoying motion sensor ones, that just waste electricity.
One small challenge we had with the electricians was our request for additional switches in the master bedroom next to the windows. This way I can "Check out the noises" without leaving my bedroom. They could not understand this concept, but reluctantly complies with our request. I anticipate never using them since we live in the country, and everyone 'knows" I live there (don't come 'round after dark!).


Monday, August 11, 2008

AC and Hot Water Connections

The AC units and hot water heaters are ready for installation.
The first 2 picsa are of the interior AC connections (power, pressure, return, and water drain) all on one set, ready to be connected to the blowers inside the house. These are refered to as "split unit" systems with the compressor systems outside and just a heat exchanger/blower inside. These are also back up heaters for the winter.
The remaining pics are the exterior connections for the A/C and the connections for the bathtub hot water heater. The water heater is gas fueled and provides "on demand" hot water. No hot water tanks here! This will provide the hot water for the bath tub and the "Senmenjou" (AKA: Tooth Brushing Sink).


Wiring...

The wiring is ready to be closed up. The first pic shows the temporary switches used during construction. The other two show the mess of wires in a single location. This will ultimately smooth out and be controlled by a single block of 6 switches.
I will be sure to add some more photos as the electrician closes up these holes in the wall. Japanese style is to use only mounting plates and actual switches...no light switch boxes. This is par for the course, check out the previous post about ceiling wiring with no junction boxes.
I am sure the finished product will look nice, despite the non-western behind the scenes wiring.